2011年2月25日星期五

Time to Throw Away Your iTunes

Everyone who has a iPhone or iPod is using itunes definitely. However, does everyone like it? Does everyone think it is convenient? Does everyone really want to use it if they have a substitute that is more easier to use and can do much more for your iPhone and iPod? I think everyone wants to replace it because it has too many limitations and it serves apple but not people who has a iPhone or iPod. Now it is the time to throw away your itunes. Because you have this iPhone transfer and iPod transfer.

This powerful iPhone Transfer can help you to import songs/videos/images from your computer to iPhone. It can also backup your iPhone music/videos/images to your computer or external hard dirve. Most important, it can help you to put your DVD movies and videos/movies you download from internet and the format is not supported by iPhone to iPhone easily. It can also help you to make iPhone rigntones for iPhone users from video/dvd/music they have.
OK, only from what I said you may not fall in love with it immediately. Let's see how it works for you.

Part 1: How to Import DVD Movies/Videos/Songs/Images to iPhone
Step 1: Connect iPhone

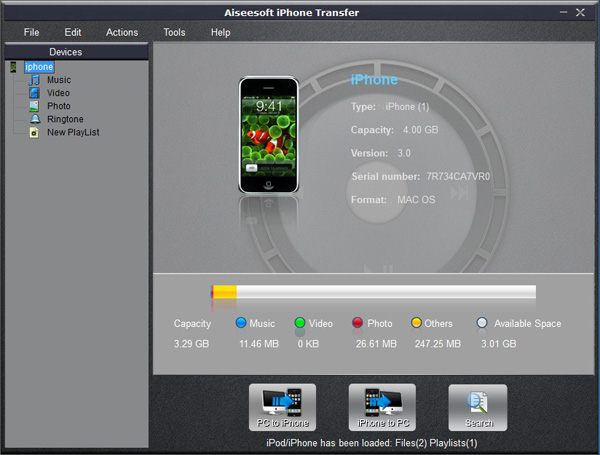
Plug your iPhone to your computer via USB cable, it can automatically find your iPhone, load your iPhone info and show the info at the left of its interface. (It works the same as itunes.)


Step 2: Import to iPhone
A. Import DVD movies to iPhone (iTunes does not allow you to do this)


1.Select “Movie” in the left list and then click “PC to iPhone” button at the bottom of the interface, you will see a conversion and import window.
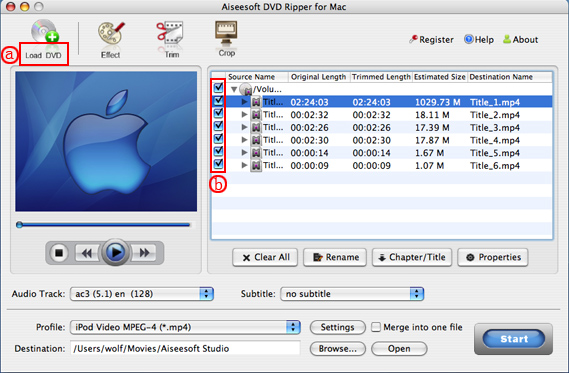
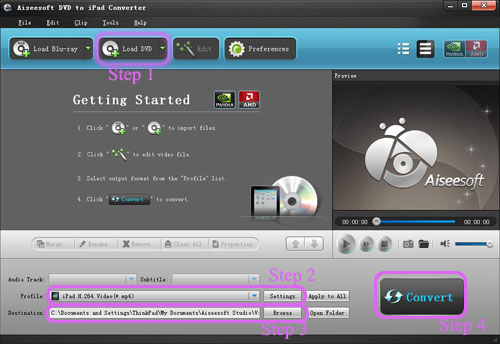
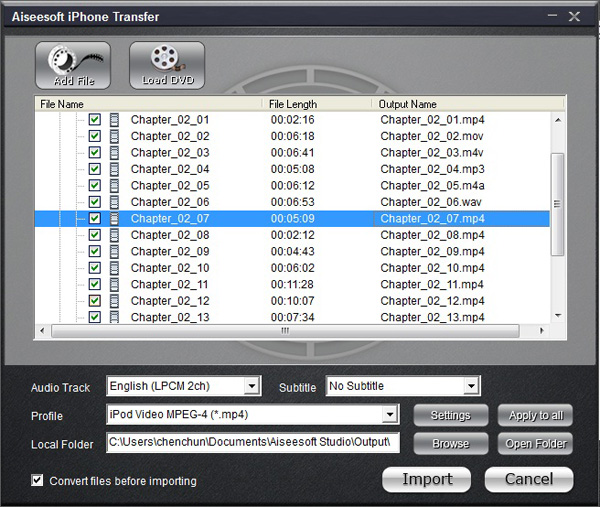
2.Put your DVD movies in your DVD Drive and Click “Load DVD” button to load the movies.
3.You can choose “Audio track” and “Subtitles” of the output movies, if you do not want a subtitle just leave it blank. You need also select the output profile and you can select apply to all button to use this output profile forever, if you do not use it some day, you can change it at will.
4.Click “Import” button and it will help you to convert the movies to iPhone video format and then import into your iPhone directly.

Note:
You need to check the box before “convert files before importing”, if not the movies/videos/songs can not be recognized by iPhone and can not be played in iPhone.

B. Import videos/songs to iPhone (iTunes only import certain format videos/songs to iPhone)


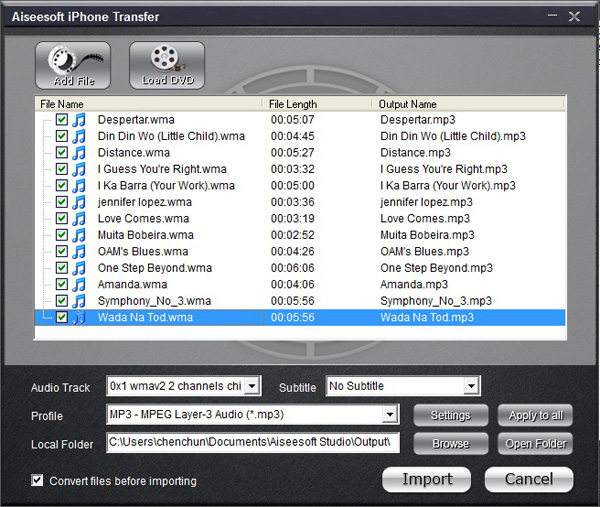
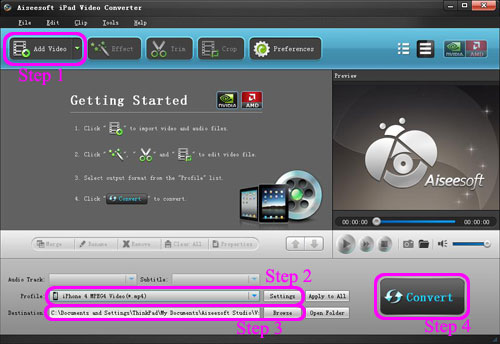
1. Select “Video” or “Music” in the left list and then click “PC to iPhone” button and go to the conversion and import window
2. Click “Add File” button to add the video or music to it and you can choose output profile and then click “import” button
Note:
If the videos and songs' format is not supported by iPhone, this powerful iPhone transfer will convert them first and then transfer them into your iPhone. If you have lots of videos or songs it may take longer to transfer them to your iPhone.

C. Import photo/images to iPhone
The process of importing images to iPhone is the same as videos/songs. First you need to select photo in the left list. Second you can select photos to import to your iPhone.
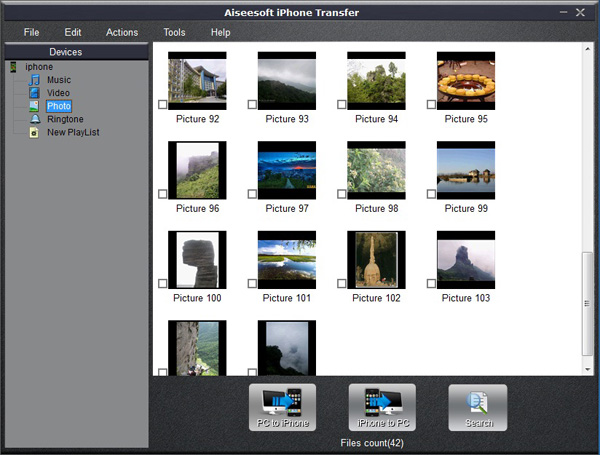


Note:
If you import a photo you do not want to you iPhone, you can right click the selected photo and then delete it from iPhone directly.

D. Import and Create Ringotnes to iPhone (iTunes can only import but not create)


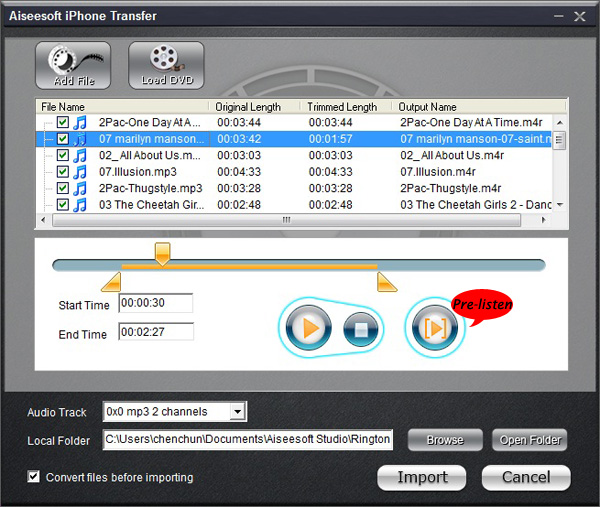
1.Select Ringtone on the left list
2.Click “PC to iPhone” button and you will go to the make ringtone and import window.
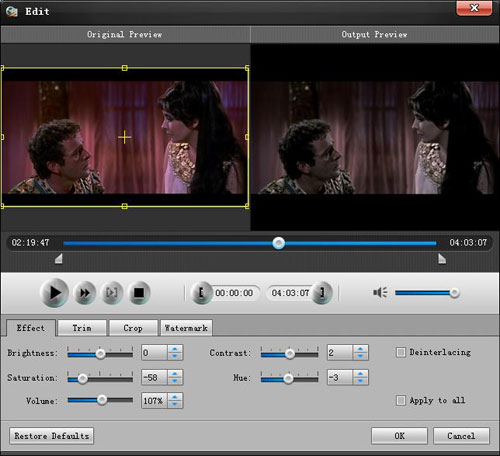
3.Here this powerful iPhone transfer allows you to create ringtones for iPhone from DVD/Movie/Video/Music.
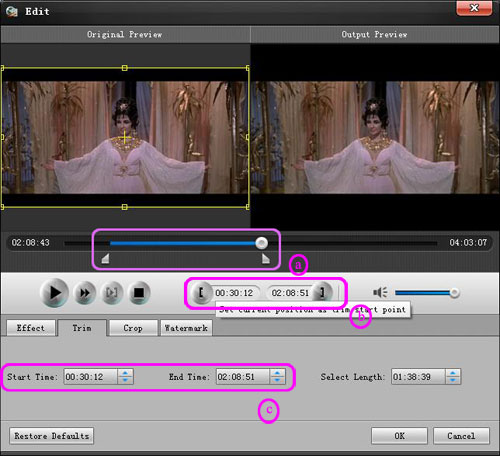
4.After you load a video, music or a DVD, you can pick up one part of it as your ringtone. You can pre-listen the ringtone. If not satisfied, change it and re-prelisten it.
5.After you find your right part as your ringtone, click “import” button. It will generate your ringtone and then import to your iPhone directly.

Part 2: How to Backup your iPhone Music/Images/Videos on Computer(iTunes does not allow you to do backup, NEVER!)
Run the software, and connect your iPhone/iPod to your computer via USB cable. After done, the iPhone/iPod icon and its library and playlists will appear in the Device list.

Step 1: Open the library/playlist that you want to export files, and then check the file(s) you want to export in the file list.

Step 2: Click “iPhone to PC” button to select the destination of the exporting files and start exporting files.

OK, you can throw away your itunes NOW!

If you are a Mac user, here are also a realy niceiPhone Transfer for Mac, it can do the same thing as the windows version.
Transfer DVD/Movies/Video/Songs/Images to your iPhone and backup Music, Video, Ringtones, and images to your Mac easily.


Also there is iPod Manager for Mac for Mac users. It has the same function as the iPhone transfer for mac.

2011年2月24日星期四

How to Rip DVD and Convert Video for Your iPad On Windows/Mac

Aiseesoft iPad Converter Suite is newly released software for iPad fans. It can rip any DVD files (DVD-Video, DVD folder and DVD IFO file) to iPad, convert all popular videos/audios to iPad formats and transfer files from PC to iPad, from iPad to PC and from iPad to iPad. It works similar to iTunes. So why do you always buy movies and songs from iTunes with extra money? It can help you make use of your resources.
The product is very easy in use. You just need download, install and run the trial version.


The product is multifunctional. It can trim, crop, edit video effect, merge, add text and image watermark, select audio track and subtitle, adjust video settings and snapshot.

If you are Mac user, you can choose Aiseesoft iPad Converter for Mac Suite.

2011年2月16日星期三

How to add DVD clips into Apple iMovie.

iMovie is similar to Windows Movie Maker, it supports MOV and MP4 video, so you just need to convert your DVD movie to the right format. Aiseesoft DVD Ripper has a Mac Version which supports both Mac OS Tiger and Leopard; you can download it for free from here: http://www.aiseesoft.com/dvd-ripper-for-mac.html
It is easy to use for the operation steps being similar to the windows version.


When the conversion is finished, you can run the iMovie, build a new project, and then drag the converted files to the work space to make personal files.
When the task is finished, In the Menu bar, Click "File" -> "Export" and save it as QuickTime video.


Download Aiseesoft DVD Ripper for Windows (put DVD into Windows Movie Maker)
Download Aiseesoft DVD Ripper for Mac (put DVD into Apple iMovie)

2011年2月15日星期二

How to Convert AVCHD Video to SD

No longer worry about looking for devices supporting AVCHD video, Aiseesoft AVCHD Video Converter can help you convert AVCHD movie to SD video like AVI, MOV, M4V, DivX, XviD, ASF, WMV supported by devices like iPod, iPhone, Apple TV, PSP.

Follow the tips below and learn how to convert AVCHD video with the professional AVCHD Video Converter.

1. Free download Aiseesoft AVCHD Video Converter, install it to your computer and launch.

2. Press "Add File" to add your wanted files.

3. Choose the proper output destination and the target video format.

4. Click "Start" button to start conversion. A few minutes later, you can transfer the converted video files to your portable devices like iPod, iPhone, PSP.
Tips 1: With Merge function, you can choose merge AVCHD video into one SD file to convert several files into a successive one for convenience.

Tips 2: Aiseesoft AVCHD Video Converter provides various video and audio editing functions. You can make detailed settings such as video encoder, resolution, frame rate, video bitrate for video and audio encoder, sample rate, channels, audio bitrate for audio.

Tips 3: As powerful AVCHD video converter, it can capture pictures from videos and save them as JPG, GIF, BMP files.

Free download Aiseesoft AVCHD Video Converter and try AVCHD video to SD video conversion with fast speed and high quality. More information at: Convert AVCHD to SD video

How to Convert DVD and Video to Your Fashionable iPad

iPad has been released for about a month, but it is pretty popular among people. I think you guys who got iPad are very proud. How do you make full use of its great space without spending extra money? Show it off before friends? It is the best choice to use DVD collection and video you have. But how do you deal with it?
Recently I got the information from internet. I feel it is useful for all, so I’d like to share it with you guys. It is third-party software that can rip DVD and convert video for iPad. And the whole process is so easy. They are Aiseesoft DVD to iPad Converter and Aiseesoft iPad Video Converter.

Next it is divided into two parts to describe it in details.
Part One: How to Rip DVD to iPad.
Firstly you need download the software: Aiseesoft DVD to iPad Converter. And then install and run DVD to iPad Converter.
The specific operating steps as follows:


Step 1: Load DVD.
Click "Load DVD" to add your DVD contents.
Step 2: Set output video format.
Click "Profile" button from the drop-down list to select the exact output video format that is the most suitable for your iPad. You can click the "Settings" button to set parameters of your output video such as such as Resolution, Video Bitrate, Frame Rate, Audio Channels, Sample Rate, etc. to get the best video quality as you want.
Step 3: Select the output path by clicking “Browse” button from the line of destination.
Step 4: Click the "Start" button to start the conversion.

Part Two: How to Convert Video to iPad.

Also it is the same. Firstly download the software: Aiseesoft iPad Video Converter. And then install and run iPad Video Converter.

The specific operating steps as follows:


Step 1: Add video.
Click "Add Video" to add your video contents.
Step 2: Set output video format.
Click "Profile" button from the drop-down list to select the exact output video format that is the most suitable for your iPad. You can click the "Settings" button to set parameters of your output video such as such as Resolution, Video Bitrate, Frame Rate, Audio Channels, Sample Rate, etc. to get the best video quality as you want.
Step 3: Select the output path by clicking "Browse" button from the line of destination.
Step 4: Click the "Start" button to start the conversion.

Tips:
The two pieces of software have some basically editing functions such as trim, crop, effect,
1. Trim:
Three ways to do trim:
a. Drag the “start scissors bar” button to where you want to start and “end scissors bar” button where you want to end. (1)
b. You can click the “Trim From” button when you want to start the trim during your preview and click “Trim To” button when you want to end.
c. Set the exact “start time” and “end time” at right part of the trim window and click “ok”.


2. Crop:
Three ways to do crop
a. Select one crop mode from the "Crop Mode" drop-list.
b. Dragging crop frame to choose your own crop.
c. Set your own crop value.


3. Effect
Drag the adjustment bar to find your favorite effect of Brightness, Contrast, Saturation and Volume.


4. Merge into one file.
Pick the "Merge into one file" to merge the files you choose into one output file. (2)

There is another piece of software named iPad Converter Suite. It includes DVD to iPad Converter, iPad Video Converter and iPad Transfer.